
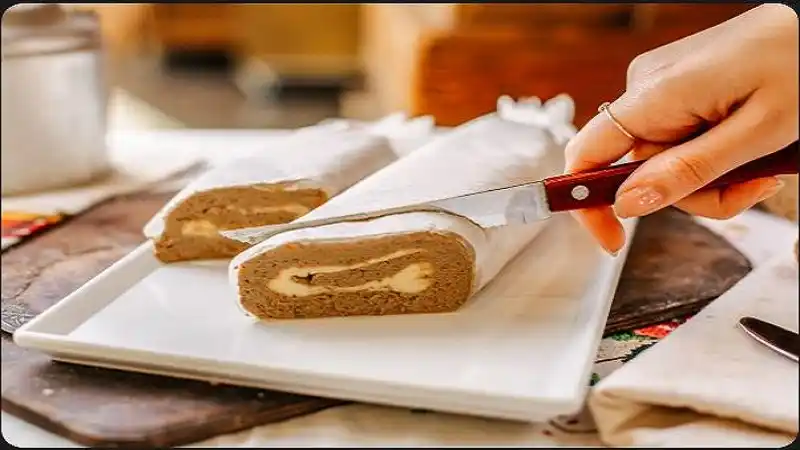
A butterfinger cake recipe is a wonderful treat to enjoy, which layers moist cake and creamy toppings with a crunch from your favorite candy bar. It is quickly becoming a staple treat in America and is considered an easy to assemble cake that will impress everyone. Making a butterfinger cake can bring nostalgia to mind while also delivering a sweet, sugary, flavor
profile your friends and family can enjoy during any event. Anyone who loves candy and sweet desserts can whip this up and make it seem professional without a bakers degree.
Why You’ll Love This Butterfinger Cake Recipe
The benefits of a butterfinger cake recipe can attest to how great this dessert really is. First, a simple butterfinger cake is something that you won’t spend hours preparing in the kitchen. Secondly, the taste and texture is unparalleled with its light fluffy cake, and crunchy topping, balanced by creamy and smooth textures as well. Third, if you are having a party or
celebrating, butterfinger cake can be easily shared by anyone at your party and enjoyed with almost any pairing. Unlike most desserts that only stay fresh for 24 hours, butterfinger cake stays good in your fridge for up to 4 days after being prepared. And while butterfinger cakes seem complicated and layered, most of the recipe components can be whipped together or prepared easily.
Ingredients Needed for Butterfinger Cake Recipe
Since a butterfinger cake can be created as easy as can be, it is a great recipe to prepare for beginners to make or use when you’re low on time and just need to satisfy your sweet tooth. To prepare one such cake, you will need the following ingredients, but you can also experiment or add additional elements depending on how you like to enjoy butterfinger
cakes. You’ll need the chocolate cake mix (any kind will do!), two cups of water, three eggs, 1/2 a cup of vegetable oil and 14 ounces sweetened condensed milk.
Kitchen Tools Required
Just like many of the other ingredients needed, the tools you’ll require for your butterfinger cake recipe are simple and easy to obtain at home or through simple purchase. Start with a 9 x 13 baking pan and a mixing bowl. From there, you will need measuring cups and a spoon to scoop the ingredients needed into their proper measurements before mixing all of your butterfinger cake recipe ingredients together. From there, the fun really begins.
Preparing the Cake Batter
The best place to start with a butterfinger cake recipe of your own is by ensuring the base cake is prepared perfectly so you can add all the wonderful toppings later. For best results, use a cake mix as the base ingredient of your dessert. Take your cake mix and prepare your cake as the instructions on the package dictate for your baking pan size, typically
involving three eggs, two cups of water and half a cup of oil. Ensure not to overmix your cake batter as it may compromise the soft, fluffy texture your cake needs.
Baking the Cake to Perfection
While all the sweet and delicious steps are fun and important, baking the cake properly can be quite crucial, if you’re hoping to master the best butterfinger cake recipe. Preheating your oven to the recommended temperature as stated on your cake mix package instructions is the very first step. Before placing the cake mix in the pan and baking, spread and
smooth it out. Once everything has been mixed thoroughly, place the baking pan with the batter into your preheated oven, and allow your cake to bake according to its package.
Creating the Signature Holes
Once your cake has finished baking to a golden-brown color, carefully take it out of the oven, and allow it to sit at room temperature while still in the pan you used to bake it. While the cake is still warm, it’s important that you take a fork and create “holes” all across the surface of your butterfinger cake recipe. You don’t want these holes to be too deep, just
enough for all of the cream, sauce and topping to seep into the cake and make every piece that you eat taste as good as possible! The more you make, the richer each piece of cake will be, so don’t hold back too much with them; create one every few inches across the pan for best results!
Adding Sweetened Condensed Milk
Here’s where the fun really starts to begin and you’ll take on the second most exciting steps within your butterfinger cake recipe preparation. Pour one sweetened condensed milk can directly on top of your cake, coating every inch of it from top to bottom while focusing a good portion of it into each of the “holes” that you created. Making sure that every nook
and cranny is filled in is essential, otherwise your butterfinger cake can end up tasting a little plain so be thorough. This is where your butterfinger cake will really begin to transform into a wonderfully moist cake and be so enjoyable to eat.
Drizzling Caramel Sauce
Just about all the steps of making this amazing butterfinger cake recipe have so much sweetness packed into them! Once you’ve generously drizzled on your sweetened condensed milk, top your butterfinger cake recipe with caramel sauce. Any kind of caramell sauce will work wonderfully, whether that be a thick caramell from a gourmet shop or a more standard
caramel that your kids grew up with. Try to ensure that it is evenly drizzled on top of the sweet and gooey layers of condensed milk.
Cooling the Cake Properly
Believe it or not, a critical part to making the perfect butterfinger cake recipe that tastes out of this world, is to be patient! Once your cake has been fully prepared and all toppings have been placed on top, you need to let it chill! Set the cake in your refrigerator for at least two to three hours so the entire butterfinger cake recipe is thoroughly chilled and all of the
layers have a chance to set into their places. Waiting to set it will improve the quality and texture of the cake immensely.
Adding Whipped Topping
After your butterfinger cake recipe has had enough time in the refrigerator to firm and chill up perfectly, it is ready to be topped with all your wonderful whipped topping and pieces of Butterfinger! Carefully open a tub of cool whip and generously spread the whipped topping evenly across the top layer of your cake and fill in the holes from which your
caramel and condensed milk will eventually seep down to the butterfinger cake recipe base. Take a spreading tool to ensure a beautiful and smooth coating and this cake recipe should be complete and ready to decorate!
Crushing Butterfinger Candy Bars
The signature touch of a butterfinger cake recipe are, of course, your crushed up butterfingers. After everything has cooled and set with your whip, top the entire thing off with pieces of broken up Butterfingers! The trick to perfectly crunch but not overpowering butterfingers is to roughly chop up the candy bars into small chunks. Some of the butterfingers can
also be completely crushed for a crumb-like consistency. Take your 8 ounce candy bars and evenly disperse them all over the whip cream topping to complete the presentation of your cake!
Final Assembly of the Cake
With everything from cream cheese, to topping and melted chocolate chips, your amazing butterfinger cake recipe is complete, just put all the pieces together and enjoy the result of your hard work. For additional elegance and visual, it may be a fun idea to drizzle on a bit of additional caramell to your whip and top off with candy. Now take it out of the fridge,
set it up beautifully on a cake platter and allow people to dive right in for this dessert they won’t soon forget!
Refrigeration and Setting Time
Setting your delicious cake will allow the ingredients to settle and solidify together so every single bite is perfect. Allow your cake to rest and chills for at least two hours, and up to three. After time is of the essence, then you will find it easy to slice and enjoy this confection. If your friends and family are not a patient bunch and really want to devour your
deliciousness then this butterfinger cake recipe only requires two hours at most before you get to slice it up!
Serving Suggestions
There is no doubt you know how to serve a delicious butterfinger cake recipe! Slice it perfectly in order to serve and take a fork to dive in for every single bite. Serving chilled is the best, or enjoy warm if that is your preference for how to enjoy butterfinger cakes. The sweet and delicious combination will leave friends, family and even children asking for seconds,
third and even fourth servings of butterfinger cake. You’ll find yourself wanting to go back for more so always make extra for yourself so no one will know.
Storage Tips
Store your butterfinger cake recipe with a lid covering to avoid any bacteria from getting in and drying out any elements of your cake recipe! Be cautious with storage to also prevent dry flavors in your delicious cake so keep this in mind as you store your cake within your home so your guests may still enjoy the dessert the next day! Keep cool by refrigerating the
butterfinger cake recipe and you can always have on hand so you don’t feel discouraged from making another one again!
Variations of Butterfinger Cake Recipe
Whether you have some leftover Butterfingers lying in your pantry or are considering new ways to spice up your next confection, there are endless ways to enjoy this recipe by substituting components. The most simple variation is to just swap out the Butterfinger candy bars for a candy bar you like better, the most obvious option being Snickers. If you want a
unique twist, try incorporating other fun additions such as a Reese’s Pieces or crushed Oreos to mix up the experience of the best butterfinger cake recipe ever, while retaining the essential components that have all of you on their knees!
Tips for Best Results
To ensure the best possible butterfinger cake recipe results when creating this confection for you and your loved ones, take into consideration a few extra tips. Never fail to poke enough holes in your warm cake after it has been baked; as this step is absolutely essential to the overall moisturizing process of your delicious cake and without it, the experience may be
ruined for even your nearest family members, friends or other loved ones whom are all going to devour your delicious cake. Be sure not to overmix and over bake your cake!
Common Mistakes to Avoid
In the creation of any recipe, particularly your perfect butterfinger cake recipe, there are certain common mistakes that one should avoid to keep his or her cake moist. For instance, avoid poking too little holes after the cake has baked and been out for a bit, and be conscious of how hot your ingredients are if they have just come out of a recent cooking
process, before adding them to the other portion of your meal. Be sure to measure out correctly when making your butterfinger cake recipe; this part can prove to be tricky!
Final Thoughts on Butterfinger Cake Recipe
Ultimately, a Butterfinger cake recipe is a surprisingly easy way to pack a huge punch of flavor and delight into a simple confection. It balances moistness with sweetness and a welcome textural crunch from the famous candy bar. It’s a show-stopper that doesn’t require advanced baking skills, making it perfect for any occasion or spontaneous craving. Whether
you’re a seasoned baker or just starting out, this recipe is sure to become a favorite that you’ll return to time and time again for a guaranteed win.