If you love the irresistible combination of creamy ice cream and crunchy candy, then homemade butterfinger ice cream is about to become your new favorite dessert. This indulgent treat blends the rich, velvety texture of homemade ice cream with the unmistakable peanut-buttery crunch of Butterfinger candy. Making it at home not only allows you to control
ingredients and sweetness levels but also gives you the freedom to experiment with textures and flavors. Unlike store-bought options, this version delivers freshness and a deeper flavor profile. Whether you’re preparing dessert for family gatherings or simply craving something sweet, this guide will help you create the perfect batch from scratch.
Why Choose Homemade Over Store-Bought
There’s something special about preparing ice cream at home. Homemade butterfinger ice cream offers a level of customization you simply can’t get from store-bought varieties. You can adjust sweetness, control ingredient quality, and ensure freshness in every scoop. Additionally, homemade ice cream lacks unnecessary preservatives and artificial
additives often found in commercial products. The result is a cleaner, richer taste. When you make it yourself, you also get to experiment adding more Butterfinger chunks, swirling in caramel, or even tweaking the base for a healthier version. It becomes not just a dessert, but an experience worth sharing and enjoying.
Key Ingredients You’ll Need
To make the perfect homemade butterfinger ice cream, you’ll need a handful of simple yet essential ingredients. These typically include heavy cream, whole milk, sugar, vanilla extract, and crushed Butterfinger candy bars. Each ingredient plays a critical role in achieving the desired texture and flavor. Heavy cream provides richness, while milk balances the
consistency. Sugar sweetens and helps with smooth freezing, and vanilla enhances overall taste. The crushed Butterfinger pieces are the star of the show, adding crunch and that iconic peanut-butter flavor. Choosing high-quality ingredients ensures your final product tastes exceptional and creamy.
Equipment for Ice Cream Making
While making homemade butterfinger ice cream doesn’t require complicated tools, having the right equipment makes a big difference. An ice cream maker is highly recommended for achieving a smooth, creamy texture. If you don’t have one, don’t worry there are no-churn methods that work beautifully. You’ll also need mixing bowls, a whisk or electric mixer,
measuring cups, and a freezer-safe container. A spatula helps fold in the Butterfinger pieces evenly. Investing in basic kitchen tools ensures consistency and ease during preparation, making the process enjoyable rather than stressful.
Understanding the Ice Cream Base
The base is the foundation of any great ice cream, including homemade butterfinger ice cream. Typically, it’s made by combining cream, milk, sugar, and flavoring agents. Some recipes use egg yolks to create a custard base, which results in a richer and smoother texture. Others skip eggs for a simpler, lighter version. The key is to balance fat and sugar to
prevent ice crystals and ensure creaminess. Taking time to prepare the base properly will significantly improve the final texture and taste of your ice cream.
Preparing Butterfinger Candy Pieces
Before adding Butterfinger candy to your ice cream, it’s important to prepare it correctly. Crush the candy bars into small, bite-sized pieces, but avoid turning them into powder. You want distinct chunks that provide crunch in every bite. A rolling pin or food processor works well for this step. Keep some larger pieces for added texture variation. When folded into homemade butterfinger ice cream, these pieces create a delightful contrast between smooth creaminess and crispy candy.
Step-by-Step Ice Cream Making Process
Creating homemade butterfinger ice cream is easier than it sounds. Start by mixing your base ingredients until smooth. If using a custard base, cook it gently and let it cool completely. Next, churn the mixture in an ice cream maker until it thickens to a soft-serve consistency. Fold in the crushed Butterfinger pieces, ensuring even distribution. Transfer the
mixture to a container and freeze until firm. The result is a creamy, crunchy dessert that’s bursting with flavor and homemade goodness.
No-Churn Method for Beginners
If you don’t own an ice cream maker, you can still enjoy homemade butterfinger ice cream using a no-churn method. This approach typically involves whipping heavy cream until stiff peaks form, then folding it into sweetened condensed milk. Add vanilla extract and crushed Butterfinger pieces, mix gently, and freeze. The whipped cream creates airiness, while
condensed milk adds sweetness and prevents ice crystals. This method is perfect for beginners and delivers surprisingly creamy results without specialized equipment.
Tips for Achieving Creamy Texture
Texture is everything when it comes to ice cream. To ensure your homemade butterfinger ice cream turns out creamy, use full-fat dairy products and avoid over-churning. Chill your base thoroughly before churning, as this helps it freeze more evenly. Adding a small amount of alcohol or corn syrup can also improve texture by reducing ice crystal formation. Lastly, store your ice cream in an airtight container to maintain its smooth consistency over time.
Flavor Variations to Try
One of the best parts about homemade butterfinger ice cream is the ability to customize it. You can add chocolate swirls, caramel ribbons, or even peanut butter for extra richness. Try mixing in brownie chunks or cookie pieces for a more indulgent dessert. Each variation enhances the original flavor while keeping the signature Butterfinger crunch intact. Experimenting with flavors allows you to create a unique version tailored to your taste preferences.
Serving Suggestions
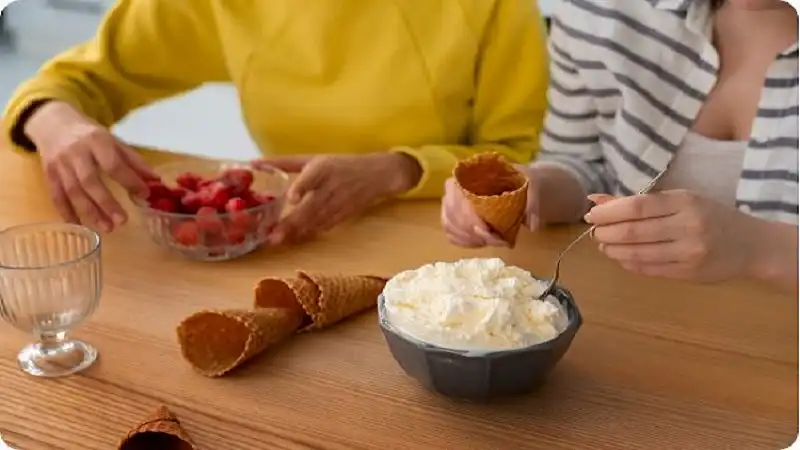
Serving homemade butterfinger ice cream can be just as fun as making it. Scoop it into bowls, cones, or even waffle cups for a classic presentation. You can top it with chocolate syrup, whipped cream, or extra crushed Butterfinger pieces. For a more elaborate dessert, serve it alongside brownies or warm cookies. Presentation adds to the overall experience, making your homemade creation feel even more special and satisfying.
Storage and Shelf Life
Proper storage is essential to maintain the quality of homemade butterfinger ice cream. Always keep it in an airtight container to prevent freezer burn and absorption of odors. Place a piece of plastic wrap directly on the surface before sealing the lid to preserve freshness. Ideally, consume your ice cream within two weeks for the best flavor and texture. While it may last longer, the quality gradually declines over time.
Health Considerations
While homemade butterfinger ice cream is undeniably delicious, it’s also a treat best enjoyed in moderation. It contains sugar, fat, and calories that can add up quickly. However, making it at home allows you to control portions and ingredients. You can experiment with lower-sugar alternatives or dairy-free options if needed. Being mindful of ingredients helps you enjoy this dessert without compromising your dietary goals.
Common Mistakes to Avoid
When making homemade butterfinger ice cream, a few common mistakes can affect the final result. Over-churning can lead to a grainy texture, while under-churning may leave it too soft. Not chilling the base properly can cause uneven freezing. Adding Butterfinger pieces too early may make them soggy. Paying attention to these details ensures your ice cream turns out perfectly every time.
Kid-Friendly Cooking Activity
Making homemade butterfinger ice cream is a fun activity for kids and families. Children can help mix ingredients, crush candy bars, and even decorate the final dessert. It’s a great way to introduce them to basic cooking skills while creating something delicious. The process is simple enough for beginners, making it an enjoyable bonding experience for everyone involved.
Seasonal Adaptations
You can adapt homemade butterfinger ice cream for different seasons and occasions. In summer, serve it as a refreshing treat on hot days. During holidays, incorporate festive toppings or flavors like peppermint or cinnamon. Seasonal adaptations keep the recipe exciting and relevant throughout the year, ensuring you never get bored of this delightful dessert.
Pairing with Other Desserts
Homemade butterfinger ice cream pairs wonderfully with a variety of desserts. Serve it alongside chocolate cake, apple pie, or brownies for a decadent combination. The crunchy candy pieces complement soft, warm desserts perfectly. Pairing enhances the overall flavor experience and makes your dessert spread more impressive and satisfying.
Budget-Friendly Dessert Option
Making homemade butterfinger ice cream can be surprisingly cost-effective. Buying ingredients in bulk and preparing multiple batches reduces overall cost compared to premium store-bought ice cream. Additionally, you can use leftover candy or substitute ingredients to fit your budget. This makes it an accessible treat for families and individuals alike.
Perfect for Entertaining Guests
If you’re hosting a gathering, homemade butterfinger ice cream is sure to impress your guests. Its unique flavor and homemade touch make it stand out from typical desserts. You can prepare it in advance, reducing stress on the day of your event. Offering a delicious, handcrafted dessert adds a personal touch that guests will remember and appreciate.
Final Thoughts
Homemade butterfinger ice cream is more than just a dessert it’s a delightful combination of creativity, flavor, and fun. From selecting ingredients to customizing flavors, every step allows you to make it uniquely yours. Whether you’re a beginner or an experienced cook, this recipe offers something for everyone. With the right techniques and a bit of
practice, you can create a creamy, crunchy treat that rivals any store-bought version. Enjoy the process, share it with loved ones, and savor every delicious bite.
From creative dessert ideas to more Butterfinger-inspired treats, you can discover new ways to elevate your kitchen experience here: 👉 ButterFinger